Ok, if this post title causes confusion, move on (or as we say over here "build a bridge and get over it"). This is as much about community building as it is project work. :-)
The second week of August is also the second week of the Sommerferien (Summer vacation) for the kids in Baden Württemberg. In Rümmingen (our home town), the younger kids have a week-long camp. We are going to be helping out the Ki-Ku group (Kinder Kulture) with this camp. Madge is helping with the Zirkus (circus) day and “volunteered” to provide a rolla bolla. Now for those not in-the-know, a rolla bolla is an old-time balancing device; simple in it's design and function, a bit tricky to master. (For a good look at someone who knows it well, check out the site of Signora Bella. Her photos page has her on the rolla bolla - look at photo 3). So. After a little online shopping I discovered that we could buy one for 50£, or ... TOOL TIME!
A little more searching on the ‘net produced enough photos of a decent rolla bolla to give me both dimension and design. A trip to the local Hornbach (think “German Home Depot”) provided the necessary items, and two hours of work produced the final product. One of the great blessings we have in our house here in Germany is the owner left a few power tools (insert obligatory Tim Allen grunts) and I put the table saw to work making grooves for foot traction on the board.
What? You want more detail than that? OK. here ‘tis.
Shopping list:
1 30x80cm board (I used a laminated shelving board. The lamination gives it strength and does not have warp). 75cm would be a good length too.
2 2x2x29.5cm pieces of wood for stoppers (to keep the bolla from shooting off the rolla. I used some scrap sections that I had laying about)
6 wood screws (no more than 3cm long)
1 30cm wide roll of rubber shelving padding (you can also just use rubber sheeting, but I could not find this)
1 30cm section of PVC pipe. I used a DIA 11cm with a .5cm thick wall. Actually, I started with a thinner pipe, but it flexed a bit too much with a 12 yr old on it, so I opted for the thicker pipe in the final version. The best possible “rolla” would actually be made of solid wood, as Signora Bella has it, but we're going for value here.
Drill-press or hand drill
Staple Gun
Table saw (or equivalent)
What to do (this is so easy).
Using the table saw, cut .3cm deep grooves the width of the board on both ends (I spaced mine about .5cm apart for a section of 23cm of the ends of the board).
Sand the board smooth (to get rid of jaggies from the table saw)
Flip the board and on the other side (opposite your “tread cuts”) lay down the rubber shelving padding.
In the 2 2x2 stopper sections, drill 3 pilot holes.
Screw the stopper sections down over the rubber padding on each end of the board, making sure that the padding is taut between the stoppers.
Staple the padding down in a few spots to prevent slippage.
So. The 50£ cost to buy versus the 7€ we spent in materiel, plus the two hours of labour, means that I saved a few euros :-)
Finishing:
A couple coats of polyurethane or wood varnish would not be out of line (before assembly) to keep it nice and neat. We may disassemble and paint the final product for the circus theme.
Use:
Put the bolla on the rolla and rolla bolla along!
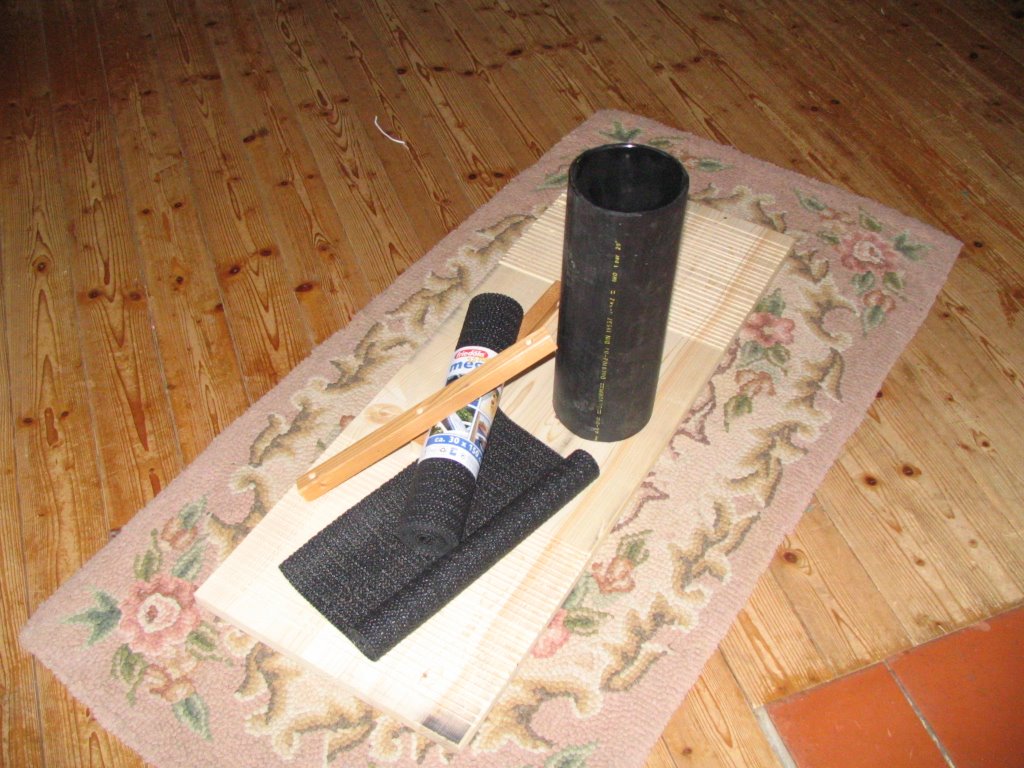
Parts:
Final product in use (note use of ‘safety stairs’ for early learning):

6 comments:
Bravo!!!!
You will be stunned to find out how quick one can go from vertical to horizontal. When I first learned the rola bola I would go to sleep with that seasaw feeling.
Have fun.
all my love,
Signora Bella- Jody
This looks great! However, I don't have a table saw so I would have to have someone else cut the treads. How important are they? What is their purpose?
Thanks!!
Eric,
the treads are to give traction for the feet (so yo won't slide off the ends). you could also just stick some sandpaper or no-slip material on the board ... it would serve the same purpose.
cheers!
Ahh I see. Thank you for this information! (As easy as this project sounds, I can think of a million ways something can go wrong!)
Nicely done! So simple even a clown could understand it!
Your blog is really awesome, thank you so much for sharing with us this valuable information.
Post a Comment